
How to Create a Gorgeous Charcuterie Board (That’s Easy!)
Charcuterie boards are one of my favorite ways to entertain — because they look fancy but are secretly simple. Like everything else in life, having the right tools and a few tricks makes all the difference. With just a little planning, you can put together a beautiful DIY charcuterie board that looks like it came straight from a magazine spread.
Whether it’s Summer, Easter, BBQ night, or a cozy evening at home, the key is to start with a theme and then layer on as many delicious elements as you can. It is very fun to create these themed boards for lots of different occasions! In my opinion, three things is too little — aim for 5–7 different elements (or more!) so there’s a variety of flavors and plenty to look at. Variety and color is what makes a charcuterie or cheese board pop.
First thing first!
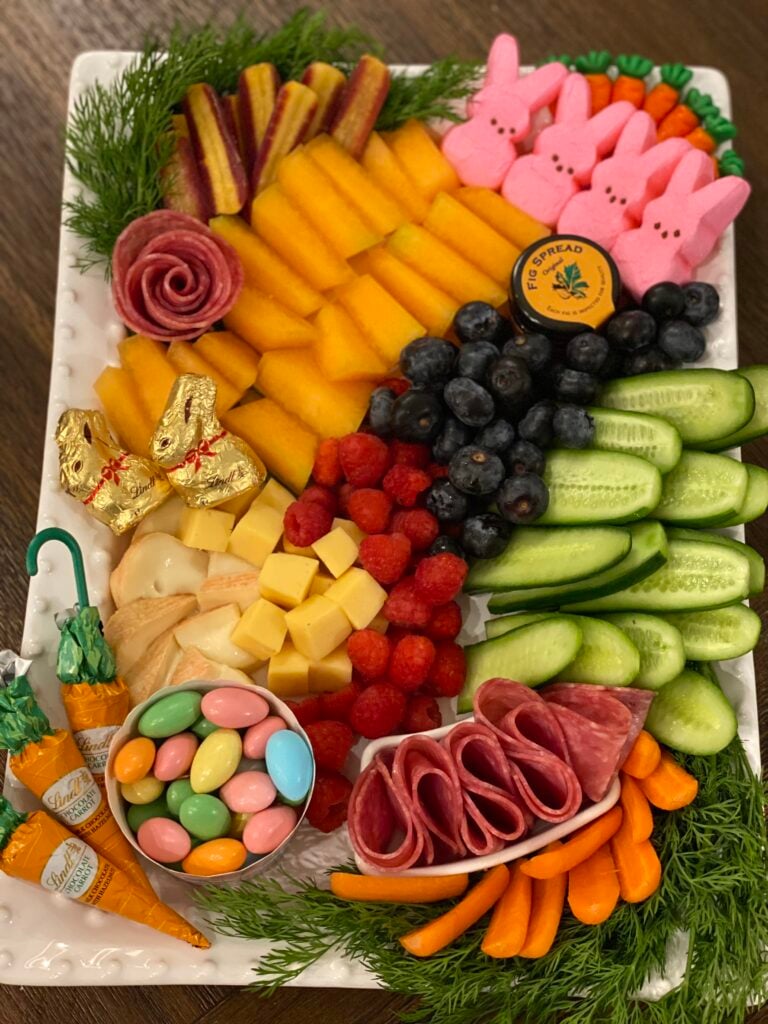
Step 1: Choose Your Theme
Before you buy a single cracker, think about the overall vibe you want:
- Summer: Bright fresh fruit, lighter soft cheeses, fresh herbs like rosemary or basil.
- Easter: Pastels, chocolate eggs, Peeps for fun, spreadable cheese like brie.
- Fall BBQ: Smoky meats, rustic breads, hard cheeses with deep flavor.
The theme will guide your selections and make your board feel intentional from start to finish. You could even go to Pinterest or Google to find some inspiration pics!

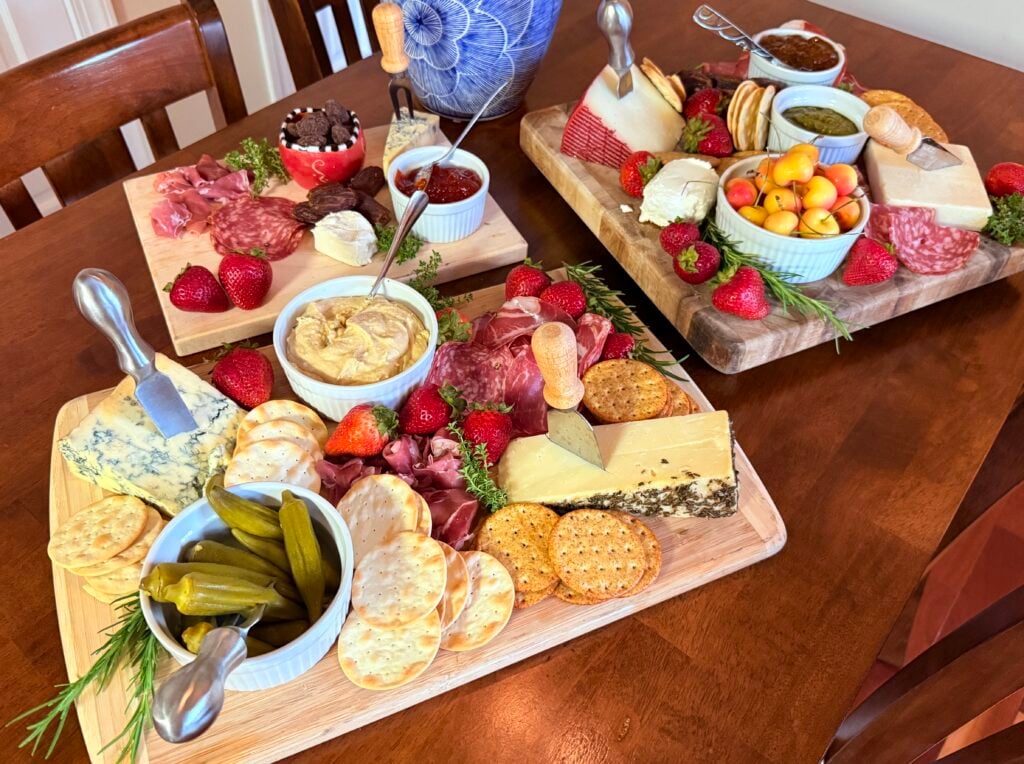
Step 2: Gather Your Tools
A perfect charcuterie board starts with the right base and accessories. Don’t overthink it — you can use a wooden board, a big turkey platter, or even a large rustic tray. The important thing is size. You want enough room for generous rows that span the length or go corner-to-corner. Only use smaller boards if you are serving 4 people or less. A Large board is typically the way to go!
Stock up on a few essentials:
- Cheese knives for easy slicing and serving.
- Little bowls for nuts, olives, or dips- Grab what you have but 2-3 should do it.
- Large platters if you’re feeding a crowd.
- Get creative, look around your house! Got some fun crystal candy dishes? What about votive cups- yes, I said votive cups- clean that sucker out and use it for a toothpick holder!
Step 3: Selecting the Cheeses
Cheese is the star, so aim for a variety of different textures and flavors. Vary the form- you want slices of cheese, logs, cubes, etc.
- Hard cheeses like aged cheddar, parmesan or pecorino romano add sharpness and structure.
- Soft cheeses such as brie or camembert bring creamy richness. (Hello double brie…YUM!)
- For something bold, add blue cheese.
- Include a spreadable cheese like garlic herb Boursin for easy scooping.
- I always like to have at least one kind of goat cheese, there are some really fun ones like cranberry or blueberry goat cheese.
Where do you get these? My favorite places to shop for cheese are Trader Joe’s, Whole Foods, and BJ’s! I like shopping where there is a variety and good pricing- and yes, Whole Foods is reasonable! They also have the very best cheese department you have ever seen, and their staff can help you immensely. Pro-tip: Check out the seaside cheddar and thank me later! It is my one of my favorite things!
Step 4: Selecting the Meats
A variety of meats is key for both taste and visual appeal. Think prosciutto, hard salami and even deli meat, I like to use different types of meats that appeal to everyone like smoked turkey or ham. Summer sausage can be great as well!
Step 5: Crackers
I like to buy a few different kinds to appeal to everyone, don’t forget a gluten free option like rice crackers. Vary the shapes and sizes — long breadsticks, round crackers, This variety of flavors and textures keeps guests coming back for “just one more bite.“
Step 6: Fruits, Nuts, and Extras
These little touches take your board from good to unforgettable:
- Fresh fruit like grapes, figs, strawberries, or slices of pear for color and freshness.
- Red peppers, yellow peppers, celery, carrots, there is no hard and fast rules here, just whatever veggies you like and a variety.
- Olives, pickles, etc.
- Honey or jams- whatever sounds good to you! Fig jam is awesome, or something fun like that.
- Nuts such as almonds or candied pecans for crunch.
- Flowers- I like small flowers you can tuck in and under the bowls, but get whatever you love! Small roses, daises, etc.
- Fresh herbs— whatever you have on hand, I love to go outside and cut several clippings of rosemary or thyme, and of course, whatever the grocery store has in the herb section! Keep it simple- one or 2 kinds.
- Seasonal extras — Peeps for Easter, or candy canes for winter, etc.
- What else is fun? Stay on theme and go crazy!
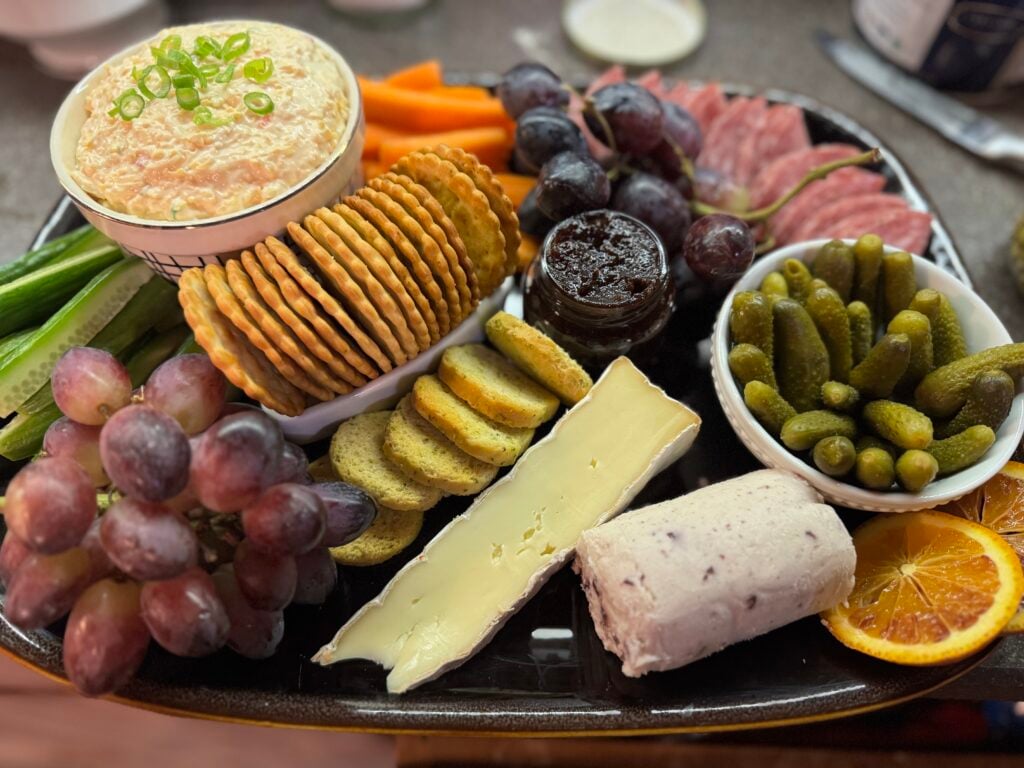
Step 7: The BEST PART; Putting It All Together
Start by placing your bowls first (for nuts, dips, or olives), then anchor the corners or center with your largest items like grapes or a wheel of brie. Work outward with rows of cheese and meat, letting them curve slightly for a more organic look. When slicing the cheese, you will want a variety of different shapes, so one kind can be squares while you should cut the next into triangles to vary it up!
Fold salami slices into quarters and stack them slightly fanned out for texture. Roll longer slices of cured ham for a little height. Cut them in half, and line them up in tidy rows. Arranging them in arcs or flowing lines keeps the board looking natural and inviting.
Fill gaps with fruit, bread, crackers, or herbs until the board looks abundant. Pile it up high, don’t be shy, we want this to look appealing and amazing!
The goal is not perfection — it’s creating something that feels generous and welcoming. The best charcuterie board can be dressed up or down depending on your event, but the balance of color, texture, and variety will always make it a hit.

Last Step and final tips for a Beautiful Board
- Aim for at least one item in each category: hard cheeses, soft cheeses, variety of meats, fruit, nuts, something spreadable, and something crunchy.
- Keep items in generous groupings rather than scattering single pieces around.
- Don’t be afraid to redo sections until they look right — trial and error is part of the fun.
There’s always an excuse to make a good charcuterie board- Super Bowl Sunday, or any game days, Easter, Christmas, Christmas Eve, Birthday Parties, New Years Eve, special occasions and it is the perfect appetizer to bring to an event- you will be the star and they will ask you how you did it! What a beautiful way to bring a little joy into the world, after all who doesn’t love a classic charcuterie board?!
Whether you’re going for a simple charcuterie board for a weeknight dinner or a beautiful charcuterie board for a holiday gathering, the same principles apply: thoughtful selection, intentional arrangement, and a little creativity.
Bon appétit — and have fun with it!